Blog

Siding Replacement (Step-By-Step Process Explanation)

Siding plays a crucial role in protecting your home from the elements while also enhancing its aesthetic appeal. Over time, however, siding can deteriorate, leading to various issues such as decreased energy efficiency and compromised structural integrity.

Siding replacement is a significant investment but one that can significantly improve your home’s value, curb appeal, and energy efficiency. In this comprehensive guide, we’ll explore everything you need to know about siding replacement, including:

  • Signs that indicate it’s time for an upgrade to
  • Questions to ask your contractor before starting the project
  • How to make a budget
  • Steps in the replacement process

Signs That You Need Siding Replacement

show casing a house need siding replacement

Noticing these signs in your home’s exterior? It may be time for a siding replacement.

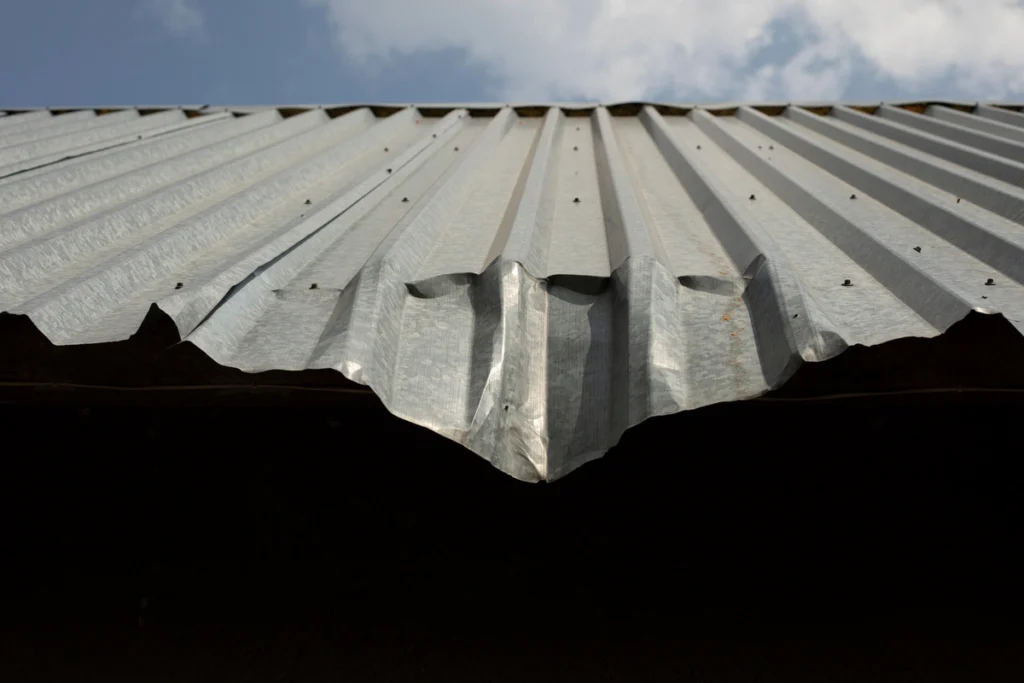
  • Visible Damage: Cracks, warping, or rotting are clear signs that your siding needs attention. These issues compromise the siding’s ability to protect your home from moisture and can lead to further damage if left unaddressed.
  • Increased Energy Bills: If you notice a spike in your energy bills, it could be due to inefficient siding allowing heat or cool air to escape from your home.
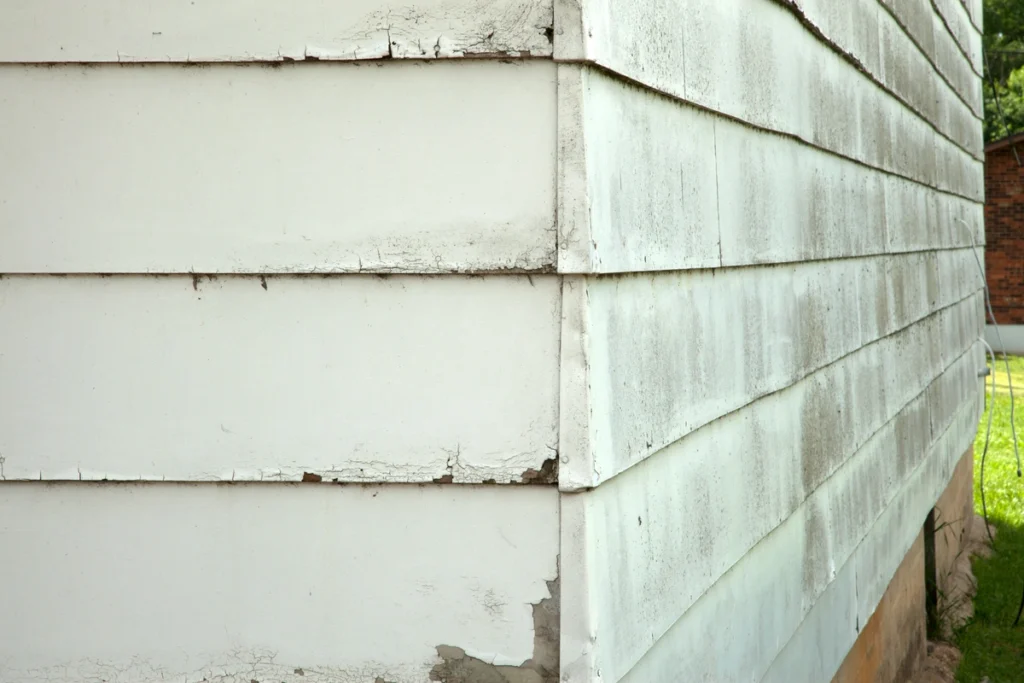
  • Mold or Mildew Growth: Mold and mildew thrive in moist environments, and damaged siding can provide the perfect breeding ground. If you spot mold or mildew on your siding, it’s time for a replacement.
  • Faded or Peeling Paint: Peeling or faded paint is not just an aesthetic issue; it’s also a sign that your siding is no longer adequately protecting your home.
  • Warping or Buckling: Siding that is visibly warped or buckling is likely past its prime and needs to be replaced before it causes further damage.

Things to Consider When Replacing Your Siding

Replacing siding is a huge undertaking. Before you contact a contractor, it’s a good idea to do some research into the following:

  • Material: There are various siding materials available, including vinyl, wood, fiber cement, and metal. Each has its pros and cons in terms of durability, maintenance, and aesthetics.
  • Style: Consider the architectural style of your home and choose siding that complements its design. Whether you prefer a traditional look or a more modern aesthetic, there’s a siding style to suit your preferences.
  • Climate: Take your climate into account when selecting siding materials. For example, in areas with high humidity or frequent rain, moisture-resistant materials like vinyl or fiber cement may be more suitable.
  • Budget: Determine your budget for the project, including the cost of materials, labor, and any additional expenses such as permits or repairs.

10 Steps in the Siding Replacement Process

installing siding on a house

Replacing your home’s siding involves a series of steps to ensure a smooth and successful project. Here’s an overview of what to expect during the siding replacement process:

1) Initial Inspection:

The first step is to conduct a thorough inspection of your existing siding to assess its condition and identify any underlying issues that need to be addressed. This includes checking for signs of damage, rot, mold, or structural problems.

2) Selecting Materials:

Once the inspection is complete, you’ll need to choose the type of siding material you want to use for your replacement. Consider factors such as durability, maintenance requirements, aesthetics, and budget when making your selection.

3) Preparing the Site:

Before installation can begin, the area around your home will need to be prepared. This may involve removing any obstacles or landscaping features that could interfere with the siding installation process.

4) Removing Old Siding:

The next step is to remove the existing siding from your home. Depending on the type of siding and its condition, this may require careful dismantling or outright removal. Special care will be taken to avoid damaging the underlying structure or insulation.

5) Repairing Substrate:

With the old siding removed, any damaged or deteriorated substrate will need to be repaired or replaced. This may involve patching holes, replacing rotted wood, or reinforcing the framing as needed to ensure a solid foundation for the new siding.

6) Installing Moisture Barrier:

Before installing the new siding, a moisture barrier or house wrap will be applied to the exterior walls. This helps prevent water infiltration and moisture buildup, which can lead to mold, rot, and other issues.

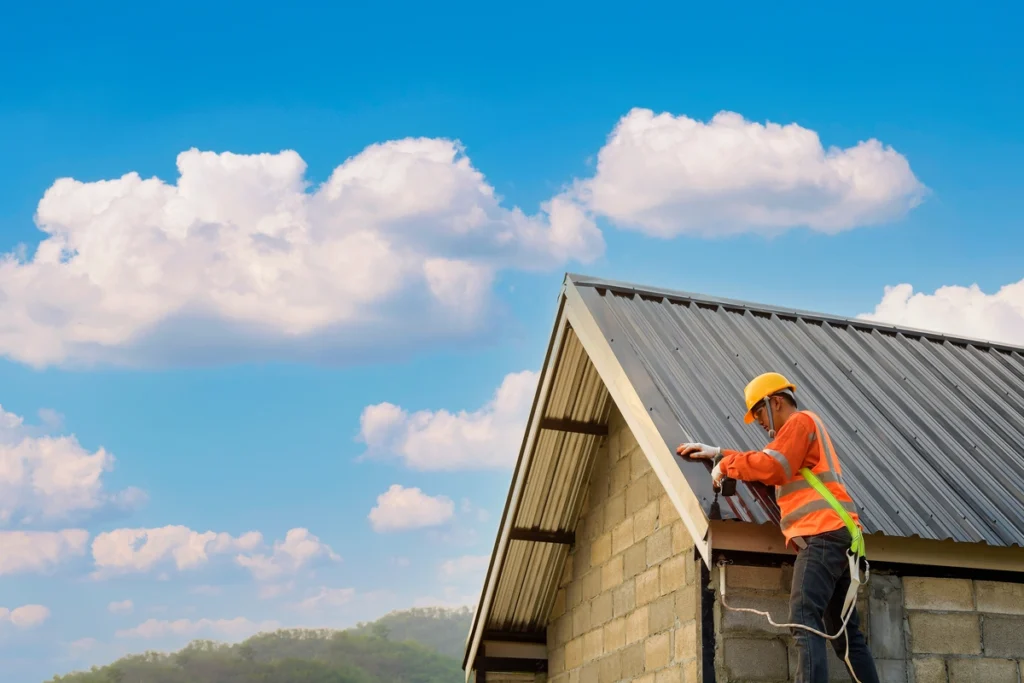
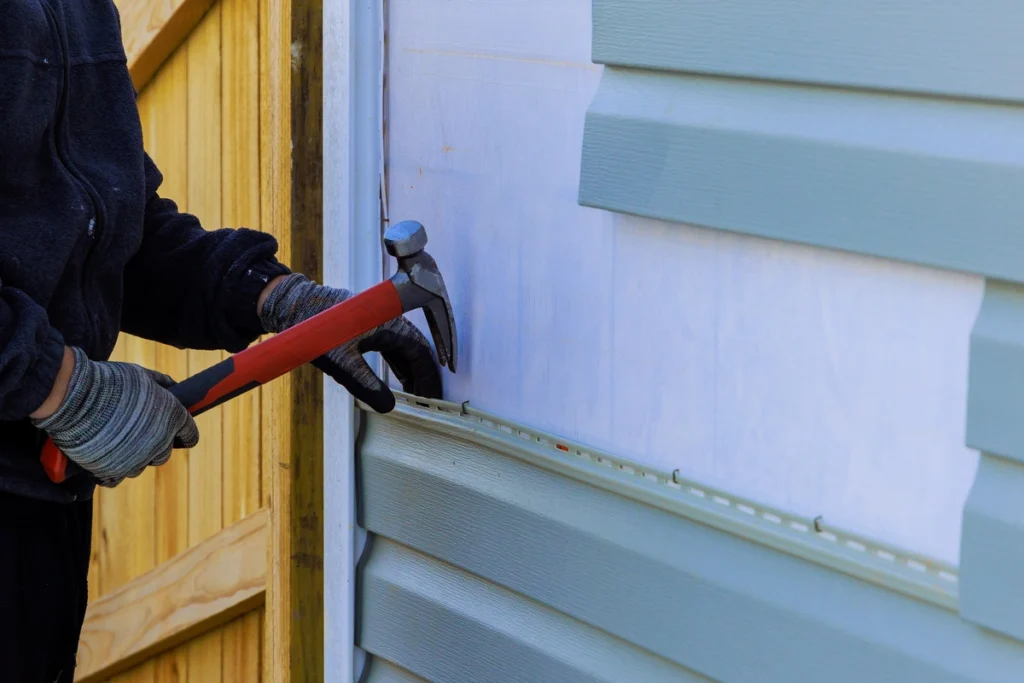
7) Siding Installation:

With the preparation work complete, the new siding can be installed according to the manufacturer’s instructions. This involves carefully fitting each piece of siding into place, securing it to the wall, and ensuring proper alignment and spacing.

8) Sealing and Flashing:

To ensure a watertight seal and protect against moisture intrusion, special attention will be given to sealing joints, corners, and around windows and doors. Flashing may also be installed to redirect water away from vulnerable areas.

9) Finishing Touches:

Once the siding is installed, any necessary finishing touches will be made, such as installing trim, caulking seams, and painting or staining the siding as desired.

10) Final Inspection:

Before considering the project complete, a final inspection will be conducted to ensure that the siding has been installed correctly and meets quality standards. Any remaining issues will be addressed before the project is officially completed.

By following these steps and working with experienced professionals, you can ensure a successful siding replacement project that enhances the beauty, durability, and energy efficiency of your home for years to come.

How to Make a Budget for Your Siding Replacement

Planning a budget in advance can help alleviate stress. Here are a few tips:

  • Research Costs: Research the average costs of siding materials and installation in your area to get an idea of how much you can expect to spend.
  • Get Multiple Quotes: Obtain quotes from several reputable contractors to compare prices and services.
  • Factor in Additional Costs: Don’t forget to budget for any additional expenses such as permits, repairs, or upgrades.
  • Consider Long-Term Savings: While high-quality siding may have a higher upfront cost, it can save you money in the long run by increasing energy efficiency and reducing maintenance expenses.

Different Siding Options

Choosing your siding material is a hugely important decision. Below, we’ve compiled some of the most popular options:

Vinyl Siding:

Vinyl siding is affordable, low-maintenance, and available in a wide range of colors and styles. It’s resistant to rot, insects, and fading, making it a popular choice for homeowners.

Wood Siding:

Wood siding offers a natural, timeless look and can be painted or stained to match your preferences. However, it requires more maintenance than other materials and is susceptible to rot and insect damage.

Fiber Cement Siding:

Fiber cement siding is durable, fire-resistant, and available in various textures that mimic the look of wood or stucco. It’s low-maintenance and resistant to rot, insects, and extreme weather conditions.

Metal Siding:

Metal siding, such as aluminum or steel, is durable, fire-resistant, and requires minimal maintenance. It’s available in a range of finishes and can give your home a sleek, modern look.

How New Siding Adds Value to Your Home

Sure, adding new siding can be expensive. But it can add value to your home, in the long run.

  • Improved Curb Appeal: New siding can instantly enhance your home’s curb appeal, making it more attractive to potential buyers.
  • Increased Energy Efficiency: High-quality siding with proper insulation can improve your home’s energy efficiency, leading to lower heating and cooling costs.
  • Enhanced Protection: New siding provides better protection against moisture, pests, and other environmental elements, preserving the integrity of your home’s structure.
  • Higher Resale Value: Investing in new siding can increase your home’s resale value, allowing you to recoup a significant portion of your investment when selling.

How Siding Improves Your Energy Efficiency

Still nervous about the cost? A quality siding installation can actually save money, by making your home more energy efficient.

  • Insulation: Siding with built-in insulation or added insulation during installation helps regulate indoor temperatures, reducing the need for heating and cooling.
  • Air Sealing: Properly installed siding creates a tight seal around your home, preventing drafts and air leakage that can contribute to energy loss.
  • Reflective Properties: Some siding materials, such as light-colored vinyl or metal, have reflective properties that help deflect heat from the sun, keeping your home cooler in the summer.
  • Moisture Control: Moisture-resistant siding prevents water infiltration, which can lead to mold growth and structural damage. By keeping moisture out, siding contributes to a healthier indoor environment and prevents energy loss due to dampness.

Questions to Ask Your Contractor Before Your Siding Replacement

Your contractor can make or break your siding installation. Here are some questions you should ask to ensure a smooth installation process.

Are You Licensed and Insured?

Ensure that your contractor is licensed to perform the work in your area and has adequate insurance coverage to protect you against liability.

What Experience Do You Have?

Ask about the contractor’s experience with siding replacement and any certifications or training they have in the field.

Can You Provide References?

Request references from past clients and follow up to get feedback on their experience working with the contractor.

What is the Timeline for the Project?

Get a clear timeline for the project, including start and completion dates, to ensure it fits your schedule.

What is the Warranty Coverage?

Inquire about the warranty coverage for both materials and labor to understand what is included and for how long.

How Will You Handle Permits and Inspections?

Make sure the contractor will obtain any necessary permits and arrange for inspections as required by local building codes.

What is the Payment Schedule?

Clarify the payment schedule and make sure it aligns with the progress of the project, with a portion of the payment withheld until the work is completed to your satisfaction.

Get The Facts You Need

Siding replacement is a significant investment in your home’s appearance, durability, and energy efficiency. By paying attention to signs that indicate your siding needs attention, carefully considering your options, and working with a reputable contractor, you can ensure a successful siding replacement project that enhances your home’s value and comfort for years to come. Whether you opt for vinyl, wood, fiber cement, or metal siding, the benefits of a fresh exterior are undeniable, making it a worthwhile investment for any homeowner.

Got questions? Contact Open Box Roofing to get the answers you deserve. 

Related Post

Metal roofs are becoming increasingly popular among homeowners due to their durability, energy efficiency, and sleek aesthetic appeal. However, like any other roofing material, they are susceptible to damage and require maintenance.

If you’re a homeowner dealing with issues related to your metal roof, this comprehensive guide will walk you through everything you need to know about metal roof repair including:

Common Signs of Metal Roof Damage

metal roof damage

Recognizing the signs of metal roof damage early can save you from more extensive and costly repairs in the future. Here are some common indicators that your metal roof might need attention:

  • Leaks and Water Stains: One of the most obvious signs of metal roof damage is water leaks. If you notice water stains on your ceiling or walls, it might be due to a leak in your metal roof. Leaks can result from various issues like loose seams, damaged flashing, or punctures in the roofing material.
  • Rust and Corrosion: While metal roofs are designed to resist rust, prolonged exposure to moisture can cause corrosion over time. Look for any rusty patches or discoloration on the metal panels. Rust can weaken the structural integrity of your roof and should be addressed promptly.
  • Loose or Missing Fasteners: Fasteners hold the metal panels in place. Over time, these fasteners can become loose or go missing due to weathering or improper installation. Loose fasteners can cause the panels to shift, leading to potential leaks and other issues.
  • Dents and Dings: Hailstorms, falling branches, or even heavy foot traffic can cause dents and dings in your metal roof. While minor dents may not pose an immediate threat, they can compromise the roof’s appearance and, in some cases, affect its performance.
  • Sagging Rooflines: If your metal roof appears to be sagging, it could indicate a more serious structural issue. This might be due to damage to the underlying support structure or excessive weight on the roof. Sagging should be inspected and repaired by a professional immediately.

What Causes Metal Roof Damage?

Understanding the causes of metal roof damage can help you take preventative measures and maintain the longevity of your roof. Here are some common culprits:

Weather Conditions

Extreme weather conditions such as hail, heavy snow, and strong winds can take a toll on your metal roof. Hail can create dents, snow can add excessive weight, and strong winds can lift and displace panels.

Poor Installation

Improper installation is a leading cause of metal roof damage. If the panels are not secured correctly, it can lead to issues like leaks, loose panels, and premature aging of the roof. Always ensure that your roof is installed by experienced professionals.

Lack of Maintenance

Neglecting regular maintenance can lead to various problems. Leaves, debris, and standing water can accumulate on the roof, causing rust and corrosion. Regular cleaning and inspection can prevent these issues.

Foot Traffic

Walking on your metal roof can cause dents and damage, especially if you are not careful. Using proper walkways and limiting foot traffic can help preserve the roof’s integrity.

Aging and Wear

Over time, even the most durable materials can show signs of wear and tear. Metal roofs have a long lifespan, but they are not immune to aging. Regular inspections can help catch age-related issues early.

How to Repair a Metal Roof in 4 Steps

repairs and sky

When it comes to metal roof repair, there are several steps you can take to address common issues. While some minor repairs can be handled by homeowners, others might require professional assistance.

1) Patching Leaks and Holes

To patch a leak or hole in your metal roof, you’ll need a metal patch, roofing sealant, and some basic tools. Here’s a step-by-step guide:

  • Identify the Source: Locate the exact source of the leak or hole.
  • Clean the Area: Clean the damaged area thoroughly to ensure the patch adheres properly.
  • Cut the Patch: Cut a piece of metal patch that extends at least 2 inches beyond the damaged area.
  • Apply Sealant: Apply a generous amount of roofing sealant around the damaged area.
  • Attach the Patch: Place the metal patch over the sealant and press down firmly.
  • Seal the Edges: Apply more sealant around the edges of the patch to create a watertight seal.

2) Tightening Loose Fasteners

If you notice loose fasteners, you can tighten them using a screwdriver or wrench. Be cautious not to overtighten, as this can strip the threads and cause more damage.

3) Replacing Damaged Panels

For more extensive damage, such as large dents or severely corroded areas, it might be necessary to replace the entire panel. This process involves:

  • Removing the Damaged Panel: Carefully remove the fasteners holding the damaged panel in place.
  • Preparing the New Panel: Cut the new panel to match the size and shape of the damaged one.
  • Installing the New Panel: Secure the new panel in place using appropriate fasteners and sealant.

4) Addressing Rust and Corrosion

If you notice rust or corrosion, use a wire brush or sandpaper to remove the affected areas. Apply a rust-resistant primer and touch-up paint to prevent further corrosion.

Why You Should Use a Professional

While some minor repairs can be DIY projects, there are several reasons why you should consider hiring a professional for metal roof repair:

Expertise and Experience

Professional roofers have the knowledge and experience to identify and address issues that you might overlook. They can provide a thorough inspection and recommend the best course of action.

Safety

Roof repair can be dangerous, especially if you are not familiar with working at heights. Professionals have the necessary safety equipment and training to perform the job safely.

Quality of Work

A professional repair job ensures that the repairs are done correctly and will last longer. Poorly executed DIY repairs can lead to more significant problems down the line.

Warranty

Many professional roofing companies offer warranties on their work. This means that if any issues arise after the repair, they will come back and fix them at no additional cost.

The Cost to Repair a Metal Roof

The cost of repairing a metal roof can vary depending on several factors, including the extent of the damage, the size of the roof, and the materials used. Here’s a general breakdown of potential costs:

  • Minor Repairs: Minor repairs, such as patching small holes or tightening loose fasteners, can cost between $200 to $500.
  • Moderate Repairs: Moderate repairs, such as replacing a few panels or addressing rust and corrosion, can range from $500 to $1,500.
  • Major Repairs: Major repairs, such as extensive panel replacement or addressing structural issues, can cost $1,500 and up.

Keep in mind that these are general estimates, and actual costs can vary. It’s always best to get a detailed quote from a reputable roofing contractor.

How to Take Care of Your Metal Roof

Proper maintenance can extend the lifespan of your metal roof and prevent costly repairs. Here are some tips for taking care of your metal roof:

Regular Inspections

Conduct regular inspections, especially after severe weather events. Look for signs of damage, such as loose fasteners, rust, and leaks.

Cleaning

Keep your roof clean by removing leaves, debris, and standing water. Use a soft-bristle brush and mild detergent to clean the surface of the panels.

Trim Overhanging Branches

Trim any branches that hang over your roof to prevent them from falling and causing damage. Overhanging branches can also drop leaves and debris that cause moisture buildup.

Address Issues Promptly

If you notice any signs of damage, address them promptly to prevent them from worsening. Early intervention can save you from more extensive repairs down the line.

Use Proper Footwear

If you need to walk on your roof, use soft-soled shoes to avoid causing dents and damage. Be cautious and limit foot traffic as much as possible.

Professional Maintenance

Consider scheduling professional maintenance at least once a year. A professional roofer can perform a thorough inspection and address any potential issues before they become significant problems.

Caring For Your Metal Roof System

A well-maintained metal roof can provide your home with durable protection and an attractive appearance for decades. However, while some minor repairs can be handled on your own, hiring a professional ensures that the job is done safely and correctly. Regular maintenance and prompt attention to issues can prevent costly repairs and extend the lifespan of your roof.

We’re here to take care of your metal roof systems! Contact our team of experienced roofing professionals at Open Box Roofing today to schedule an inspection and get a detailed quote. Our experts are here to help you maintain the integrity and beauty of your metal roof for years to come.

Owning a home is a significant investment, and maintaining its exterior is crucial for its longevity and curb appeal. One of the most important aspects of your home’s exterior is its siding.

Over time, however, siding can deteriorate, requiring repair or replacement. But what does it cost to repair siding? In this blog, we’ll explore everything you need to know about siding repair cost, helping you make informed decisions to protect your home’s value and appearance. We’ll go over:

  • Why repairing siding matters
  • Different siding materials
  • Cost averages

Why Siding Matters

Siding serves as your home’s first line of defense against the elements. It protects your home from:

  • Rain
  • Wind
  • Snow
  • Sun

It also provides insulation and contributes to the overall aesthetic appeal. Damaged or worn-out siding can lead to water infiltration, energy inefficiency, and decreased property value.

Common Types of Siding Materials

Before we dive into the costs, it’s important to understand the different types of siding materials available. Each type comes with its own set of advantages and price points:

Vinyl Siding

Vinyl siding is one of the most popular choices due to its affordability and low maintenance. It’s available in a wide range of colors and styles, making it versatile for various home designs. However, vinyl can crack or warp under extreme temperatures, necessitating repairs.

Wood Siding

Wood siding offers a classic, natural look that’s hard to beat. However, it requires regular maintenance to prevent rot, insect infestation, and weather damage. Repairing wood siding can be labor-intensive and costly, but the aesthetic appeal often justifies the expense.

Fiber Cement Siding

Fiber cement siding is known for its durability and resistance to fire, insects, and rot. It’s a more expensive option upfront but requires less maintenance over time. The cost of repairing fiber cement siding can be higher than vinyl but lower than wood.

Metal Siding

Metal siding, including aluminum and steel, is durable and low-maintenance. It’s resistant to fire, insects, and rot, making it a great choice for long-term durability. However, metal siding can dent or corrode, requiring occasional repairs.

Stucco Siding

Stucco siding is popular in regions with dry climates. It’s a versatile and attractive option but can crack over time due to settling or impact. Repairing stucco siding involves patching and refinishing, which can be labor-intensive.

6 Factors Affecting Siding Repair Costs

damaged siding

The cost of siding repair varies based on several factors. Understanding these factors will help you estimate the potential expenses for your specific situation:

1) Type of Siding Material

Different siding materials have different repair costs. For instance, repairing wood siding is generally more expensive than vinyl due to the material’s cost and the labor involved in matching and replacing wooden boards.

2) Extent of Damage

The extent of the damage plays a significant role in determining the repair cost. Minor cracks or holes may only require simple patching, while extensive damage might necessitate complete panel replacements.

3) Labor Costs

Labor costs can vary based on your location and the complexity of the repair. Urban areas with a higher cost of living typically have higher labor rates. Additionally, intricate repairs or hard-to-reach areas can increase labor costs.

4) Accessibility

The accessibility of the damaged area can impact the cost. If the damage is located in a high or difficult-to-reach spot, additional equipment and safety measures might be required, increasing the overall cost.

5) Removal and Disposal

If the damaged siding needs to be removed and disposed of, this can add to the cost. Some materials, like asbestos siding, require special handling and disposal, further raising expenses.

6) Permits and Inspections

Depending on your local regulations, you might need permits and inspections for siding repairs. These additional costs should be factored into your budget.

Average Siding Repair Costs by Material

Let’s break down the average costs for repairing different types of siding materials:

Vinyl Siding Repair Cost

Vinyl siding repair is usually the most affordable option:

  • Minor Repairs: $50 – $200
  • Moderate Repairs (replacing a few panels): $200 – $600
  • Extensive Repairs (large sections or multiple panels): $600 – $1,500

Wood Siding Repair Cost

Wood siding repair can be more expensive due to material and labor costs:

  • Minor Repairs (patching small areas): $100 – $300
  • Moderate Repairs (replacing boards): $300 – $1,000
  • Extensive Repairs (large sections or severe damage): $1,000 – $2,500 or more

Fiber Cement Siding Repair Cost

Fiber cement siding repair falls in the mid-range:

  • Minor Repairs (patching small areas): $100 – $300
  • Moderate Repairs (replacing boards): $300 – $1,200
  • Extensive Repairs (large sections or severe damage): $1,200 – $2,500

Metal Siding Repair Cost

Metal siding repair costs can vary:

  • Minor Repairs (denting or small patches): $100 – $400
  • Moderate Repairs (replacing panels): $400 – $1,200
  • Extensive Repairs (large sections or severe damage): $1,200 – $3,000

Stucco Siding Repair Cost

Stucco siding repair involves patching and refinishing:

  • Minor Repairs (small cracks or holes): $200 – $500
  • Moderate Repairs (larger cracks or sections): $500 – $1,500
  • Extensive Repairs (widespread damage): $1,500 – $4,000 or more

DIY vs. Professional Siding Repair

When it comes to siding repair, homeowners often face the decision of whether to tackle the repair themselves or hire a professional. Both options have their pros and cons:

DIY Siding Repair

Pros:

  • Cost Savings: DIY repairs can save money on labor costs.
  • Immediate Action: You can address minor issues promptly without waiting for a contractor.

Cons:

  • Skill and Experience Required: Siding repair requires specific skills and tools. Mistakes can lead to more extensive damage.
  • Time-Consuming: DIY repairs can be time-consuming, especially if you’re not experienced.

Professional Siding Repair

Pros:

  • Expertise and Quality: Professionals have the experience and tools to perform high-quality repairs.
  • Warranty and Insurance: Reputable contractors offer warranties and are insured, providing peace of mind.

Cons:

  • Higher Cost: Hiring a professional comes with labor costs, which can be significant.
  • Scheduling: You might need to wait for an available contractor, delaying the repair.

Tips for Reducing Siding Repair Costs

While siding repair costs can add up, there are ways to minimize expenses without compromising on quality:

Regular Maintenance

Regularly inspect your siding for signs of damage and address minor issues promptly. Preventative maintenance can prevent small problems from becoming costly repairs.

Choose Durable Materials

Invest in durable siding materials, even if they come with a higher upfront cost. High-quality materials require fewer repairs and last longer, saving you money in the long run.

Get Multiple Quotes

When hiring a professional, obtain quotes from multiple contractors. This allows you to compare prices and choose the best option for your budget.

Consider Partial Repairs

If the damage is localized, consider partial repairs instead of replacing entire sections. This can save you money while still addressing the issue.

Check for Rebates and Incentives

Some regions offer rebates or incentives for energy-efficient home improvements, including siding repairs. Check with local authorities to see if you qualify.

Let Us Repair Your Damaged Siding

siding install

Siding repair is an essential aspect of home maintenance that should not be overlooked. Understanding the factors that influence siding repair costs and the average expenses for different materials can help you budget effectively and make informed decisions.

Ready to take the next step? Contact Open Box Roofing to assess your needs and provide a detailed estimate. We’ll protect your home and help you enjoy a beautiful, well-maintained exterior for years to come.


Winter beauty can be a nightmare for homeowners. Snow-capped roofs and icicles might seem picturesque, but they might also signal the formation of ice dams.

These icy blockages can cause significant damage to your home, leading to costly repairs. This comprehensive guide will help you understand:

  • What an ice dam is
  • Ice dam removal cost and what
  • Factors influence it

What Are Ice Dams?

Ice dams form when snow on your roof melts due to heat escaping from your attic or upper floors. The melted snow flows down to the colder edges of your roof and refreezes, forming a dam. This dam traps water behind it, which can then seep into your roof, causing leaks, water damage, and mold growth.

Leaving ice dams untreated can lead to a variety of issues such as:

  • Roof damage
  • Structural damage to your home
  • Water damage to your walls, ceilings, and insulation
  • Mold and mildew growth

The Basics of Ice Dam Removal Costs

The cost of removing ice dams will vary greatly depending on a wide variety of factors. We cover many of them in this guide below!

Average Costs

On average, homeowners can expect to pay between $300 to $1,000 for professional ice dam removal. This price range can vary based on several factors, including the size of the ice dam, the method of removal, and the complexity of the job.

Factors Influencing Ice Dam Removal Costs

Several factors can influence the cost of removing ice dams:

  • Size and Thickness of the Ice Dam – Larger and thicker ice dams take longer to remove and require more resources.
  • Roof Accessibility – If your roof is difficult to access, this can increase the labor costs.
  • Severity of the Issue – If there is already damage that needs to be addressed, this will add to the cost.
  • Type of Removal Method – The method used to remove the ice dam (e.g., steaming, chemical solutions) will also affect the price.

Methods of Ice Dam Removal

ice dam and brush

The way you remove ice dams matters. Improper removal can damage your roof and create bigger problems down the line. Follow these steps for optimal results, every time.

Professional Methods

  • Steaming: Steaming is the safest and most effective method for removing ice dams. It involves using low-pressure steam to melt the ice without damaging your roofing materials. This method is recommended because it prevents damage to shingles and effectively removes ice without risk of refreezing

Cost for steaming typically ranges from $400 to $800 depending on the severity of the ice dam and roof accessibility.

  • Chemical Solutions: Professionals may use chemical melting agents to break down the ice. While this method is less common, it can be effective in certain situations. However, it’s important to ensure that the chemicals used are safe for your roofing materials and the environment.

DIY Methods

While professional removal is recommended, some homeowners opt for DIY methods to save on costs:

  • Roof Rake – Using a roof rake to remove snow from your roof can prevent ice dams from forming in the first place.
  • Calcium Chloride Socks – You can create a DIY solution by filling socks with calcium chloride and placing them vertically across the ice dam. This will help to melt the ice, creating channels for water to escape.

Pros and Cons of DIY Methods

While taking a DIY approach may be appealing, there are both benefits and risks to keep in mind before diving in head first.

Pros

  • Cost-effective
  • Immediate action to mitigate damage

Cons

  • Safety risks involved (e.g., falling off the roof)
  • Potential for improper technique causing roof damage
  • Less effective compared to professional methods

Long-term Solutions to Prevent Ice Dams

Unfortunately, removing ice dams is only a temporary solution. If you want long-term results, you’ll need to take care of your entire roofing system. Here are some of our best tips to get rid of ice dams for good!

Improving Insulation and Ventilation

One of the best ways to prevent ice dams is by improving your attic insulation and ventilation. This helps to maintain a consistent roof temperature, preventing the conditions that lead to ice dam formation.

Installing Heat Cables

Heat cables can be installed along the edges of your roof to keep ice from forming. These cables are a proactive way to prevent ice dams but do come with installation and operational costs.

Regular Roof Maintenance

Regular roof maintenance can help identify potential issues before they become severe. This includes:

  • Cleaning gutters regularly
  • Inspecting and repairing roof shingles
  • Ensuring proper attic insulation

The Impact of Delayed Ice Dam Removal

Is leaving an ice dam alone really that big a deal? It can be. Not removing ice dams can come with severe consequences for your home.

Further Damage Costs

Ignoring ice dams can lead to more severe damage and higher repair costs in the long run. For example:

  • Water damage repair costs can range from $1,000 to $4,000.
  • Mold remediation can cost between $500 and $6,000, depending on the extent of infestation.

Health Risks

Mold and mildew resulting from water damage can pose serious health risks, particularly for individuals with respiratory issues.

Hiring a Professional vs. DIY

ice dam on roof

Still feeling tempted to tackle your ice dams by yourself? Consider all of the following factors before diving in.

When to Hire a Professional

While DIY methods can be tempting, hiring a professional is recommended when:

  • The ice dam is extensive and thick
  • You lack the necessary tools and safety equipment
  • Previous DIY attempts have failed

Selecting the Right Professional

When choosing a professional ice dam removal service, consider:

  • Experience and expertise
  • Reviews and recommendations
  • Licensing and insurance
  • Detailed estimates and quotes

Professional Ice Dam Removal For Your Home

Ice dams are more than just a winter nuisance; they can cause significant and costly damage to your home. Understanding the costs associated with ice dam removal and the factors that influence these costs can help you make informed decisions.

Need expert help with ice dam removal? Don’t wait—contact a professional at Open Box Roofing today and protect your home from winter’s icy grip.

Don’t think, just call Pink!